How to root the Google Pixel 2

There are numerous reasons to root an Android phone. You may want to change the theme of the device, enable certain functions that require deeper system access, or perhaps you just like to poke stuff until it breaks. If you're purchasing a phone with the intent on rooting it, Google's Pixel line is a solid place to start.
First and foremost, Google provides factory images for all of its devices. It's not difficult to brick your device when trying to root it, so having a solid way to get your phone working again is important. Second, unlocking your bootloader and rooting your device will not void the warranty on your Pixel phone. Finally, there is a vibrant modding community on XDA, providing tweaks and custom operating systems for Google's phones.
Tools you'll need
To root your Pixel 2 or Pixel 2 XL, you'll need a few tools. There are some one-click solutions, but anyone rooting for the first time should go the manual route, if only to make them more experienced. Here is what you'll need to root your phone:
- A Windows, Linux or Mac computer
- The Android Software Development Kit (SDK) or
- Minimal ADB and Fastboot. This tool is only available for Windows, and rather than installing the entire SDK, only installs the Android Debugging Bridge (ADB) and Fastboot components that are needed to unlock your bootloader and root the device.
- The latest factory image downloaded for your device. The Pixel 2 is codenamed "walleye", while the Pixel 2 XL is codenamed "taimen." When downloading a factory image, the image will be labeled as image-taimen-opd.X for the Pixel 2 XL and image-walleye-opd.X for the Pixel 2.
- The latest version of Magisk Manager downloaded to your computer. *The appropriate USB cable to connect your phone to your computer.
You'll also need to complete the initial setup for your phone, including setting a PIN or password to unlock your lock screen. Once that's complete, open your settings application.
- Scroll down to the bottom, then tap System.
- Tap About Phone.
- At the very bottom of the next screen, tap Build number seven times. Enter your lock screen PIN or password. You've now unlocked developer options.
- Go back to the System menu.
- Tap Developer options.
- Near the top of the page, you'll see an option titled OEM unlocking. Tap the slider to enable this, then enter your lock screen password or PIN.
- Tap Enable.
- Scroll down a bit, and you'll see the Debugging section.
- Tap the slider next to USB debugging.
- Click OK.
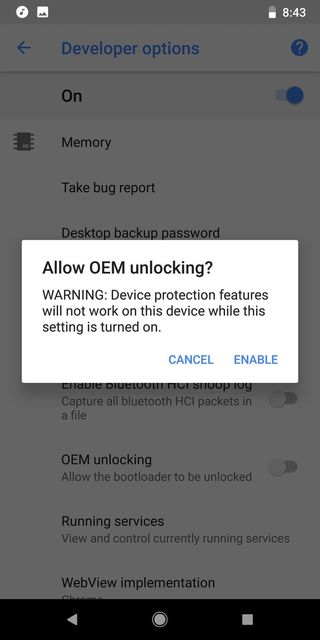
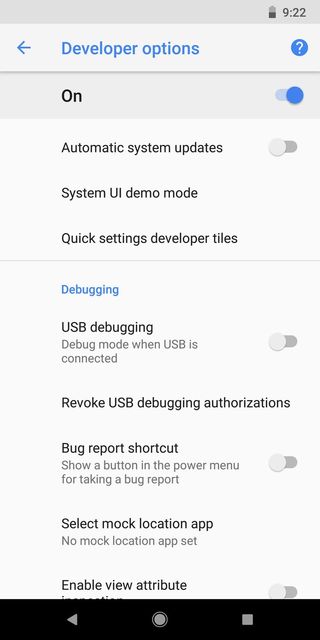
Before doing anything else, back up everything on your phone you'd like to restore. This could be photos, SMS text messages or any other local files. Unlocking your bootloader will completely wipe your phone's hard drive, so anything not backed up will be gone forever. Files can either be backed up to a cloud service like Google Drive or Google Photos, or transferred to your computer with a USB cable. Once everything is backed up, we're ready to get into the real fun of this project.
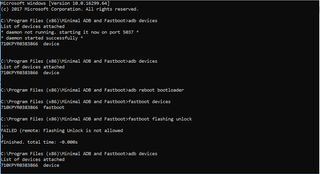
For the purposes of this guide, we'll be using Minimal ADB and Fastboot. However, the commands are the same when using the Android SDK as well if that is your preferred tool. Plug your phone into your computer, then open your command program.
- Type adb devices to ensure the ADB connection is working properly.
- A prompt will be shown on your phone screen asking if you'd like to allow USB debugging. Tap OK.
- Type adb reboot bootloader. Your phone will reboot into the bootloader menu.
- Type fastboot devices to ensure the Fastboot connection is working properly.
- Type fastboot flashing unlock. You will see a prompt on the phone to confirm you want to unlock the bootloader.
- Use to volume up button to select UNLOCK THE BOOTLOADER, then the power button to continue.
- Type fastboot reboot to reboot your phone.
- Your phone will reboot, and you'll need to set it up as brand new. Go through the normal setup process, again making sure to set a lock screen PIN or password.
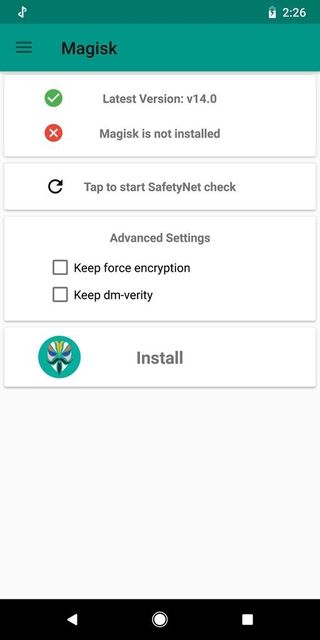
- Copy the Magisk Manager APK downloaded earlier from your computer to your phone. Sideload the application file to install it onto the phone.
Magisk is a tool that modifies the boot image for your phone, but you'll need to have the boot image downloaded first. The modified boot image provides root access to the user, as well as a root manager to manage root permissions for applications.
Be an expert in 5 minutes
Get the latest news from Android Central, your trusted companion in the world of Android
- Extract the factory image downloaded earlier, then open the extracted folder. Extract and open the image-taimen-opd.X or image-walleye-opd.X folder, then copy the file labeled boot.img to the Downloads folder on your phone.
- Open Magisk. You will be prompted to install the latest version of Magisk's tools, but it is not necessary. Click Install.
- Click Patch Boot Image File.
- Inside the file picker, navigate to the Downloads folder.
- Select boot.img.
- Magisk will use the boot image you supplied to generate a modified boot image for your phone, and give you the location of where that image is stored. Copy the modified image from the phone to your computer.
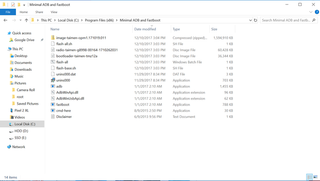
- Place the file into the Minimal ADB and Fastboot or Android SDK folder on your computer.
- Enable Developer Options just like before, and allow USB debugging. In the command window, type adb devices to make sure the phone is connected correctly.
- Type adb reboot bootloader to reboot to the bootloader menu.
- Once the phone is rebooted to the bootloader, type fastboot devices to make sure it's connected correctly.
- Type fastboot flash boot patched_boot.img. The modified boot image will be written to your phone.
- Type fastboot reboot to reboot the phone.
- Download an application like Root Check to make sure the phone is actually rooted. If not, the best course of action is to follow the unroot steps below and try again.
Unrooting
You may want to unroot the device later on. For instance, a certain app you use may not be working or you need to return the phone for warranty support. No worries, unrooting the phone is simple as pie.
- Backup any local content on your phone, such as text messages or photos.
- Copy the contents of the extracted factory image folder into the Minimal ADB and Fastboot folder.
- Connect your phone to the computer, open Minimal ADB and Fastboot and type adb reboot bootloader to reboot into the bootloader.
- Once your phone has rebooted, double click the flash-all batch file on your computer. This will flash the factory image to your phone, overwriting the modified boot image and erasing any local data.
- Once the factory image is done flashing, your phone will be rebooted. But, the bootloader is still unlocked. Hold down the power button to power the phone off, then hold the power button and volume down for a few seconds to boot into bootloader mode.
- Type fastboot flashing lock to re-lock your bootloader.
- Use the volume button to select LOCK THE BOOTLOADER.
- Type fastboot reboot to reboot your phone. Once it reboots, your phone will be like brand new, ready to set up or sell.
Do you root your phone? Let us know down below!

