How to move from a Windows laptop to a Chromebook
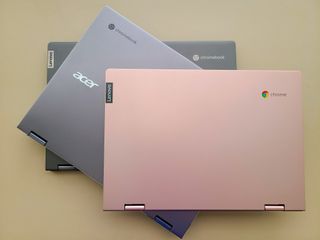
Chromebooks are the perfect computer for most people: they're easy to operate, all your data is backed up automatically, and set up is a breeze. Once you're set up with your new Chromebook, you're basically set up for life, but as we all know, migrating from one ecosystem to another is a big change, and there's a lot to do, but that's why we're here! We've already made the switch, and our experience can help make your own migration as easy as possible.
Products used in this guide
- Great Chromebook, better value: Lenovo Chromebook Flex 5 ($442 at Amazon)
- Store everything in the cloud: Storage for Google Drive/Photos/etc (From $2/month at Google)
- Sync up your old computer: Google Drive Backup and Sync (Free at Google)
How to get started
Migrating from one ecosystem to another is a big change, and it can take time. There's a lot to do, and it can seem overwhelming, so before we get down to packing up your digital life, there are two things I want you to remember:
- You do not need to do everything at once. This guide is broken up because there are several smaller activities that make up the migration process and because it's important to take breaks while you're doing this.
- If you already use a Google Account and Google services, you're more than halfway there. Your Chromebook account is tied to your Google account, which may have your photos, bookmarks, and at least some of your documents backed up already. That makes the rest of this much simpler.
Once you've gotten your new Chromebook, charge it up and turn it on. "Setting up" your new Chromebook is essentially just a matter of connecting to Wi-Fi and then logging into your Google Account, as that will sync your Chrome settings, extensions, bookmarks, and history, but since this is your first Chromebook, we'll need to get those settings where we want them.
However, before we deal with your new computer, let's finish up with your old one, shall we?
How to back up your files
Whether your new Chromebook is sitting right next to your old laptop on your kitchen table or you're backing up your files now before your purchase — or before your poor, old laptop finally kicks the bucket — it doesn't really matter. We're not transferring your files from your Windows laptop to your Chromebook; we're putting them in Google Drive so you can easily access them from your Chromebook, Android phone, or just about any device with access to an internet browser.
There are two ways to transfer our documents to Google Drive: you can do it manually on Google Drive's website, or you can download Google Drive Backup and Sync, which will upload the folders you want in the background while you keep using your Windows laptop for other things. By default your Google account comes with 15 GB of space for Google Drive, Gmail, and Google Photos to use, and a great many Chromebooks come with a two-year credit for 100 GB of Google Drive storage space, but if that's not enough either, you can purchase more on Google One
Be an expert in 5 minutes
Get the latest news from Android Central, your trusted companion in the world of Android
How to upload files to Google Drive in Google Chrome
- Open Google Chrome on your Windows laptop.
- Go to https://drive.google.com.
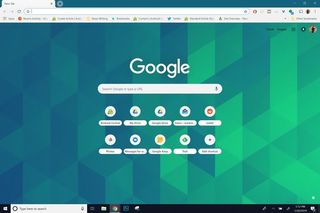
- Click New at the top of the left-hand menu.
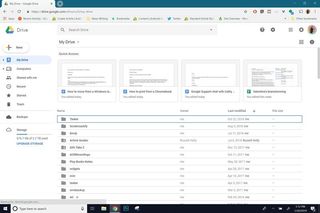
- Click Folder.
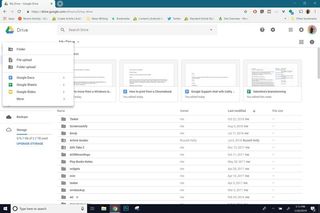
- Type a name for your new folder. Use a name that's descriptive and fairly short, like "From Windows" or "Ara Backup [Month Year]".
- Click Create.
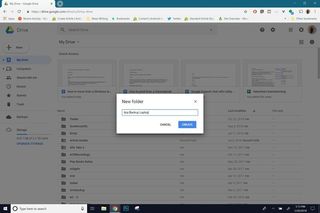
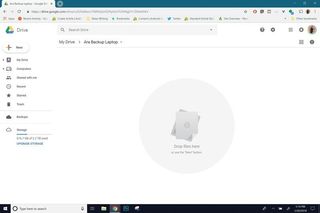
- Double-click your newly named folder to open it.
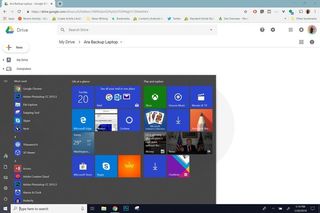
- Click the Windows logo in the bottom left corner of the screen to open the Start Menu.
- Click File Explorer.
- Select the folder or files you want to upload to Google Drive. Use Ctrl + Click to select multiple files at the same time.
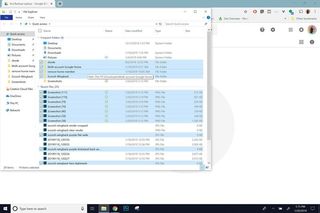
- Drag and drop your selected files from the File Explorer window to the Google Drive browser window. Google Drive should begin uploading the files immediately, displaying a progress bar in the bottom corner of the Google Drive window.
- Repeat steps 10-11 with every folder and file you wish to back up from your computer.
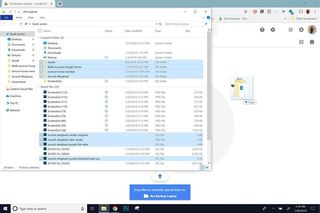
Manually backing up your files can seem tedious, but it also provides you with the opportunity to de-clutter as you back up. Don't need five years of college syllabus, lecture notes and assignments anymore? Then don't back them up.
How to backup your computer with Google Drive Backup and Sync
- Open Google Chrome on your Windows laptop.
- Open this Google Drive Backup and Sync hyperlink.
- Click Download under Backup and Sync.
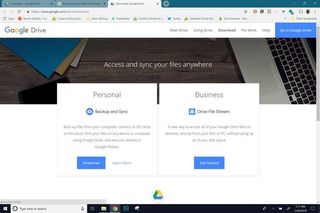
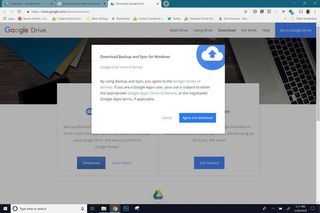
- Click Agree and download to accept the terms of service and download the installer.
- Double-click the installer to open it once it finishes downloading.
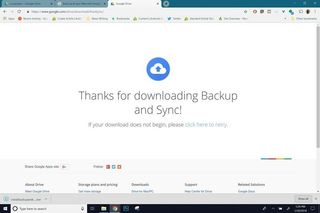
- If a pop-up appears asking if you want to allow this app to make changes to your device — like installing an app — click Yes.
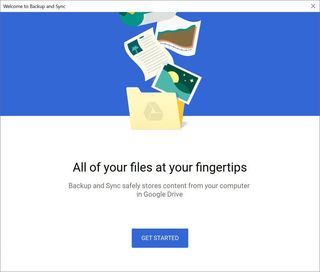
- The installer will automatically download and install the latest version of the Google Drive Backup and Sync program. Once the installer finishes, it will open Backup and Sync to set up your backup. Click Get started.
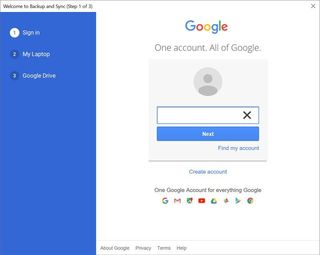
- Enter your Google username or Gmail address.
- Click Next.
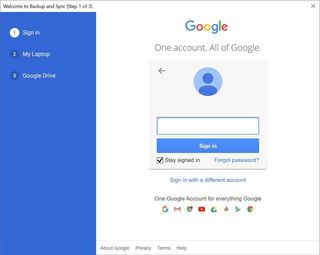
- Enter your password.
- Click Next.
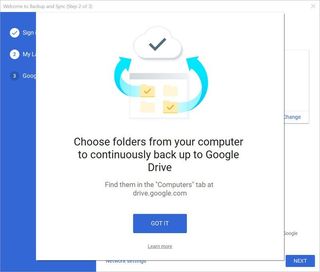
- Google Drive Backup and Sync can continuously backup your files to Google Drive, where they appear under the Computers tab. Click Got it.
- Backup and Sync will populate the Backup settings with the default folders and values. Click the checkmark next to a pre-selected folder to unselect it.
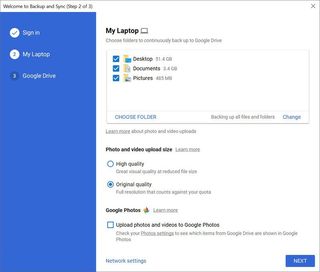
- If a folder or subfolder you want backed up isn't here, click Choose Folder.
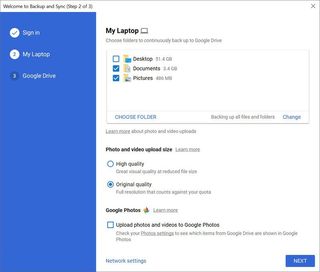
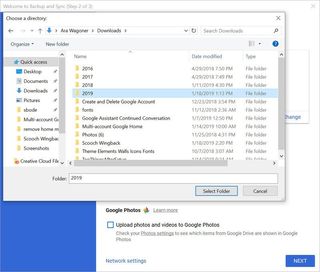
- Navigate through your file system and single-click the folder you want to back up.
- Click Select Folder.
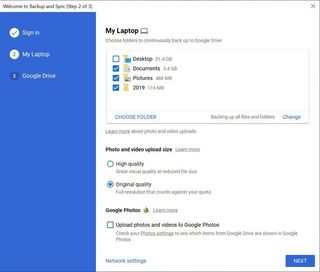
- Repeat steps 14-16 with every folder you wish to back up.
- Once you have all the folders you want backed up added, click Next.
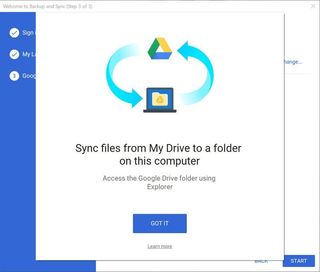
- We can sync folders from Google Drive onto your Windows laptop, giving you an offline backup on your computer should your internet go down. We're backing up a computer we won't be using anymore, but click Got it to get through this menu.
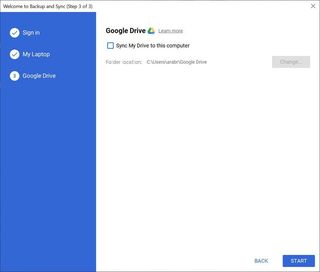
- Click Sync My Drive to this computer to turn it off because we're not going to need it on the computer we're migrating away from.
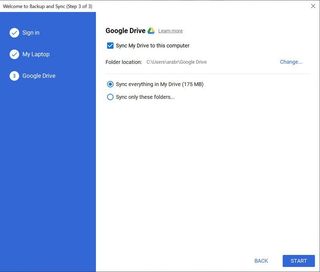
- Click Start to finish setup.
If your desktop and file system flicker or flash for a moment, that's okay! That was Google Drive integrating with the Windows File Explorer and scanning files to begin uploading. Once the upload begins, Google Drive Backup and Sync will present a pop-up in the bottom-right corner of the screen telling you that the folders you've backed up will be available in the Computers Tab of Google Drive. You can click Open Google Drive to see your Computer directory in Google Drive and verify that files are indeed being added to it.
Depending on how fast your internet is and how many files you are backing up from your old computer, it might take Google Drive Backup and Sync a while to finish uploading everything. If you need to sleep your laptop, Backup and Sync will pause and then resume once the computer wakes back up.
How to import your bookmarks and browser history to Google Chrome
If you've exclusively been using Google Chrome on your Windows laptop, congratulations! You can skip this section. If you're a fairly recent Chrome convert or you've been using multiple browsers on your Windows machine, we should probably make sure that any bookmarks hiding in those other browsers come along with you.
- Open Google Chrome on your Windows laptop.
- Click the three-dot menu icon in the top-right corner of the Chrome application window.
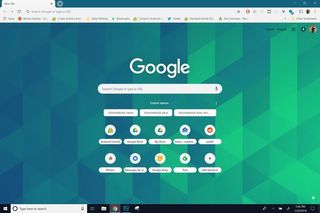
- Click Bookmarks to expand the Bookmarks menu.
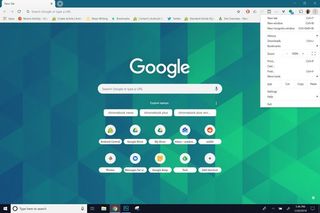
- Click Import bookmarks and settings.
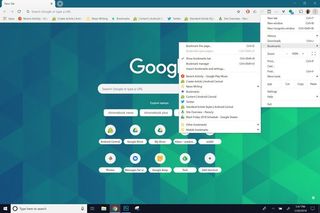
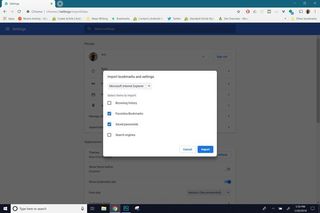
- If you have multiple alternate browsers installed, click the browser drop-down menu to select from the browsers installed on your computer.
- Click the browser you wish to import bookmarks from.
- Depending on the browser and what's available for Google to import, your import options might expand. Click the checkmark under a data type to deselect it from being imported, such as unchecking Search engines so Internet Explorer doesn't assign Bing as your search engine on Google Chrome.
- Click Import.
If you go to chrome://bookmarks/, you'll see the imported bookmarks sitting in a separate folder so that you can sort through and manage them before adding them to any other Bookmarks folders in your account.
How to get your folders and apps where you want them on Chrome OS
Now that Google Play has brought most apps you could ever need to Chromebooks, one of the biggest adjustments for migrating Windows users is that you can't use the Desktop as your digital dumping ground. The Chrome OS desktop is for your wallpaper only! All of your documents and downloads are accessible through the Files app, and your app drawer can be found by swiping up on your Chromebook's shelf.
That said, no one wants to flip into their app drawer every time they open Hangouts or Messenger, and digging through Google Drive for a folder you use every day can get tedious, too. Thankfully, we can pin apps to your Chromebook's dock for easy access, and we can add shortcuts to the Files app to quickly take you to your most-used folders.
How to pin an app to your Chromebook's shelf
- Swipe up on your Chromebook's shelf or click the circular Launcher button in the bottom left corner of your screen.
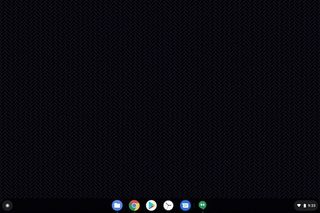
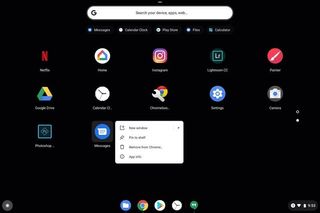
- Right-click on your desired app. If you're using the trackpad, you can right-click by clicking your trackpad with two fingers instead of one.
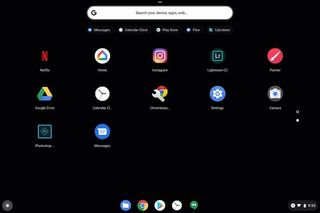
- Click Pin to shelf.
How to add a folder shortcut to the main menu in Files
- Open the Files app, the round blue icon with a white folder in it.

- Click Google Drive.
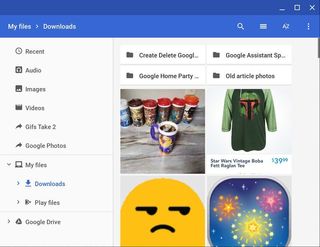
- Navigate to and right-click your desired folder. If you're using the trackpad, you can right-click by clicking your trackpad with two fingers instead of one.
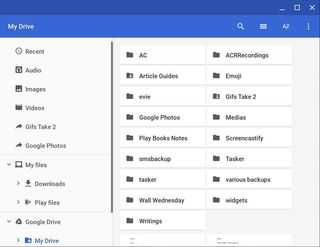
- Click Create shortcut.
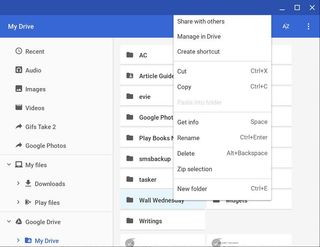
The new shortcut will appear in the directory menu between Videos and My files, where you see Gifs Take 2 and Google Photos in the screenshot above.
How to get back your caps lock button
By default, the button that would normally be your caps lock is a search button instead, but let's face it, for most of us, CAPS LOCK IS MORE IMPORTANT. Oh, excuse me, I didn't mean to shout. OR DID I?
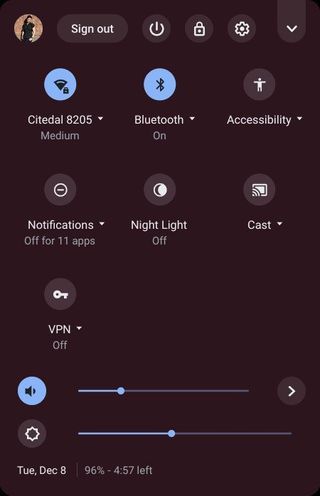
- Click the time and battery indicator on the right side of your Chromebook's dock.
- Click the gear icon to open Settings.
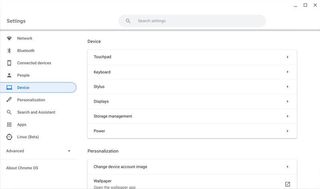
- Scroll down to the Device section and click Keyboard.
- Click the drop-down menu to the right of Launcher.
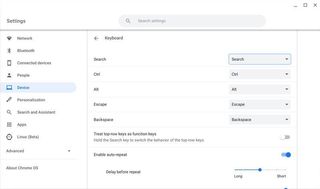
- Click Caps Lock in the drop-down menu.
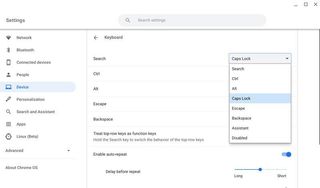
You can remap some of the other keys to your liking if you want, but Caps Lock is the only one that's terribly missed from the normal layout. While you're in this menu, go ahead and scroll down to View keyboard shortcuts. Most Chromebook shortcuts are the same as those you're used to using on the Google Chrome browser, but it's good to check and see what's changed.
What to know even more helpful keyboard shortcuts for your Chromebook? Here are 18 awesome ones!
How to link your Android phone to your Chromebook
The long-awaited feature "Better Together" was finally released on Chrome last fall, allowing your Android phone and Chromebook to work together to keep your Chromebook connected and secured when your Android phone is unlocked nearby. Turning on this connected device feature on your Chromebook is easy, and you should absolutely use it.
- Click the time and battery indicator on the right side of your Chromebook's dock.

- Click the gear icon to open Settings.
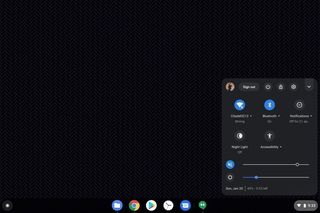
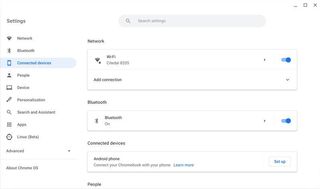
- Under Connected devices, click Set up.
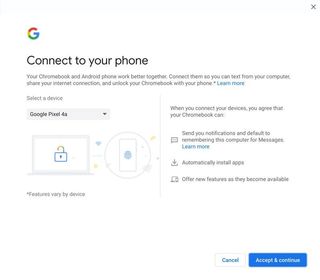
- In the setup window, you can select a single Android phone to link to your Chromebook for Connected device. If the phone listed under Select a device is not the one you wish to use, click the drop down menu.
- Click your desired phone.
- Click Accept & continue.
- Enter the password for your Google account.
- Click Done.
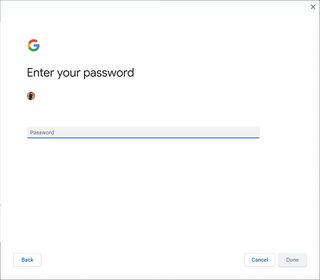
- After Google verifies your password, you'll get a completion screen. Click Done to exit the Connected device setup window.
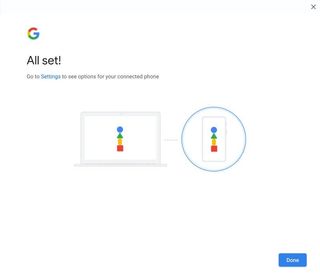
With your phone and Chromebook connected, you'll be able to use three features on your Chromebook:
- Smart Lock will unlock your Chromebook when your phone is unlocked and you wake up your Chromebook. On the login screen, the lock next to your name will turn green when the Chromebook recognizes your connected phone is unlocked. You can then tap your profile picture to unlock the Chromebook.
- Instant Tethering will turn on your phone's Wi-Fi hotspot whenever it reconnects to your connected phone (via Bluetooth) in order for your Chromebook to tether off it.
- Messages allows you to sync, read, and reply to text messages via Android Messages for Web. You have to use Android Messages as your default SMS client for this feature to work.
Make the move once, make the move forever
Chromebooks are built to be durable, dependable, and practically expendable. Once you've set up things the way you like them on one Chromebook, most of your settings and preferences will sync to every future Chromebook you upgrade to down the line — and any loaner Chromebook you get from school or work. Chrome extensions will sync along with your bookmarks and Chrome history, but you may have to re-install some of your apps from Google Play.
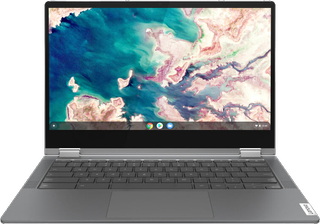
This laptop offers up the features we'd expect from more premium Chromebooks — a backlit keyboard, good front-facing speakers, and a crisp 1080p touchscreen — with enough power to back them up at an excellent price.
Yeah, there are bigger, flashier Chromebooks out there, but for your first Chromebook, grab something affordable, reliable, and adaptable. The Lenovo Chromebook Flex 5 has a 360-degree folding hinge, allowing you to put it in tent and tablet modes for touchscreen-tapping and Netflix bingeing in bed. The all-day battery life will keep you from scrambling for a charger in the middle of the afternoon, and the evenly-backlit keyboard makes it easy to work late into the night after you get sucked down the social media rabbit hole for a few hours.
Not that I've ever let that happen to me, no siree...
Additional Equipment
Chrome OS doesn't need a whole lot to go along with it other than a Google Account and some time to get acquainted, but there are a few Google Drive tools that can make migrating your Windows laptop's files to the cloud an easier experience.

Google One Storage (From $2/month at Google)
Your nifty new Chromebook might have come with some free Google Drive storage, but if it didn't or you need more, this is where you get it.
Google Drive Backup and Sync (Free Download)
Manually uploading everything to Google Drive can be a pain. Let Google Drive upload your old computer for you with this Windows app.
Ara Wagoner was a staff writer at Android Central. She themes phones and pokes YouTube Music with a stick. When she's not writing about cases, Chromebooks, or customization, she's wandering around Walt Disney World. If you see her without headphones, RUN. You can follow her on Twitter at @arawagco.

