Best Tips and Tricks for Samsung Galaxy phones running One UI (Android Pie)
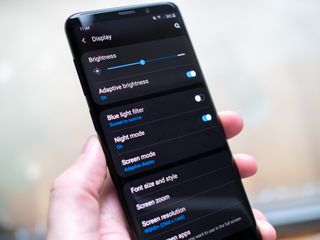
The One UI update for Samsung's latest smartphones brings a lot of new features and fun to the party, but there are also some new secrets to make it even better than it already is, and we've got the treasure map to lead you straight to them. Whether your Samsung phone got One UI right when you got it or you're falling back in love with your phone post-update, here's how to make the new UI a winner.
Great Galaxy accessories
- Amazon: Samsung 256GB EVO Plus microSD card ($49)
- Amazon: AUKEY 18W USB-C Power Bank with Quick Charge 3.0 ($30)
- Amazon: AUKEY Key Series B80 IPX6 Water-Resistant Bluetooth Earbuds ($80)
- Amazon: iOttie iON Wireless Mini Fast Charger ($26)
How to turn on Night mode
Why you can trust Android Central
There was some hubbub about there not being any free Samsung Themes on One UI — don't worry, there still are — but if you want to get some lovely, battery-friendly darkness on your phone, you can skip Samsung Themes altogether and use Night mode instead. Unlike Samsung Themes that only theme some Samsung apps and system elements, Night mode switches all Samsung apps and system menus to a dark theme that's supposed to be easier on the eyes at night, hence the name.
Note: You cannot have a custom Samsung theme enabled for Night mode to work, you need to be on the default theme that your phone was using out of the box.
- Open the Settings app.
- Tap Display.
- Scroll down and tap the toggle next to Night mode.
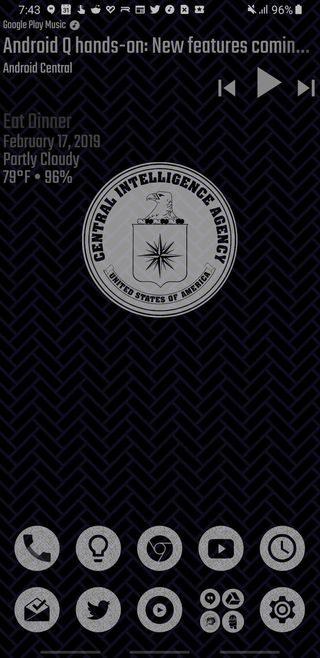
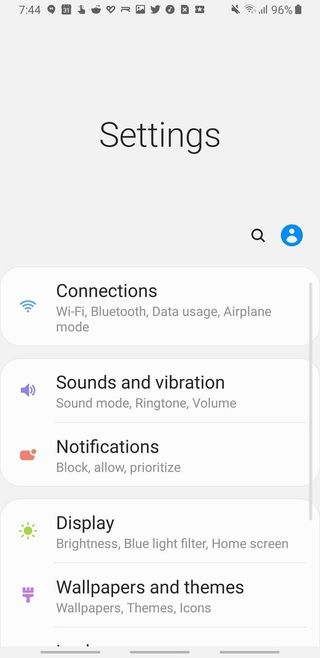
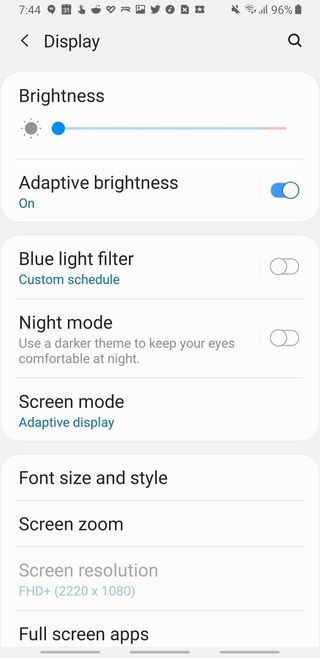
While Night mode might not be quite the all-AMOLED Black some more customized dark themes are, it reaches more apps and is more consistently applied to the device. While Night mode cannot be turned on according to a schedule yet — though ideally that's coming down the line — it is easy to toggle on and off from the Settings app, and you can add it to the Quick Settings panel in your notification shade.
- Swipe down from the top of your screen to open the notification shade.
- Swipe down from the top of your screen to open the quick settings panel.
- Tap the three-dot menu button.

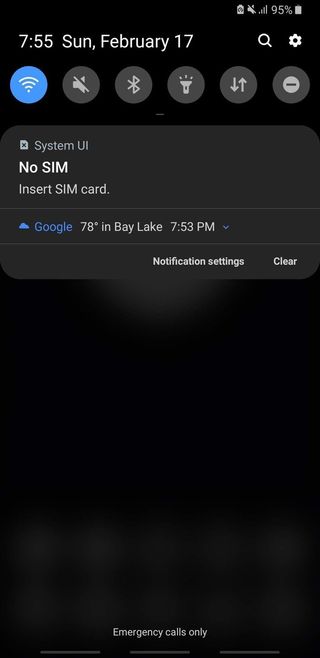
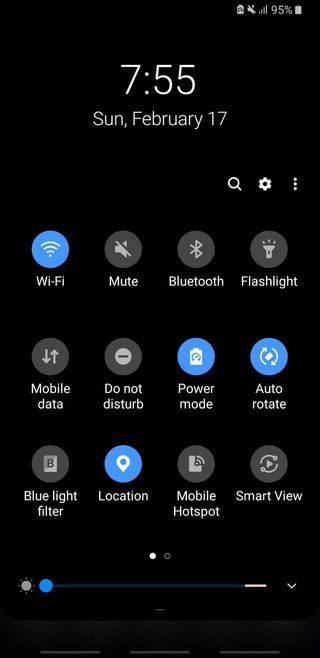
- Tap Button order.
- Drag and drop Night mode from the top carousel to the Quick Settings layout.
- Tap Done.
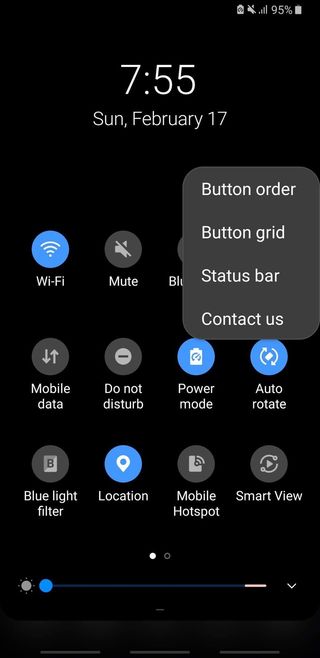
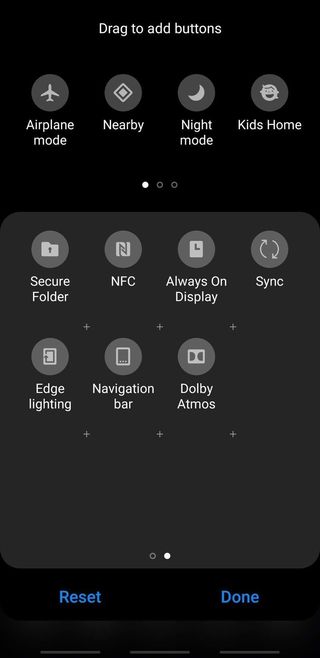
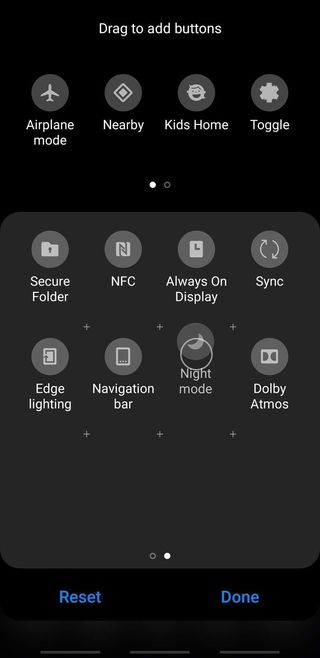
With Night mode added to your Quick Settings panel, you can now activate Night mode from any screen with ease.
Make the most of gestures
Android Pie began a new arms race among Android manufacturers to develop a new navigation system to replace the traditional nav bar, and while Samsung's is the most pedestrian of the bunch, it's the easiest to learn and the easiest to adapt to. You should really give it a try and get the absolute most you can out of your tall, beautiful screen!
Test drive Samsung's full-screen gesture navigation system
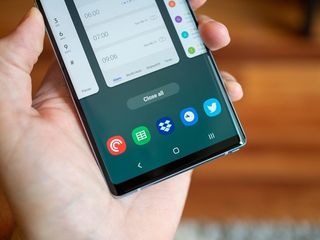
Whichever nav system you use, the Recent apps screen has gotten more useful than ever, with a five-app dock at the bottom of the screen that features your most used apps that haven't been recently launched. There are also a couple of other gestures out there to take advantage of hiding in the Advanced features menu.
- Open the Settings app.
- Scroll down and tap Advanced features.
- Tap Motions and gestures.

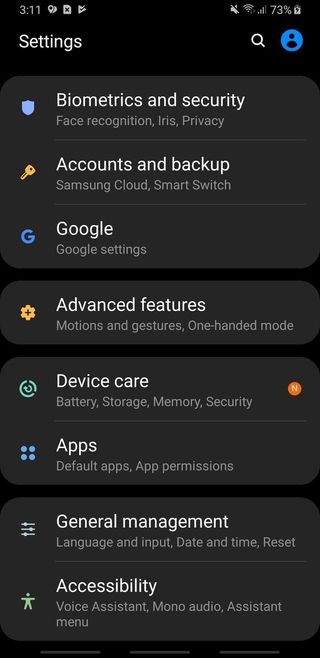
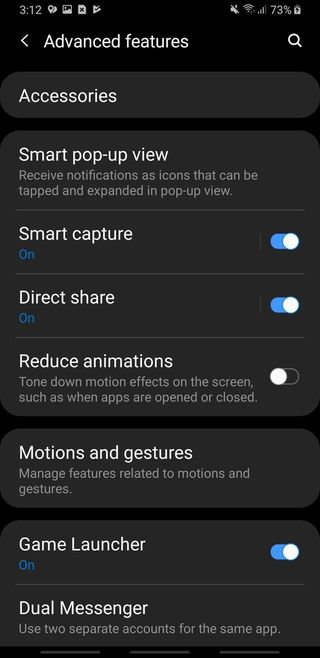
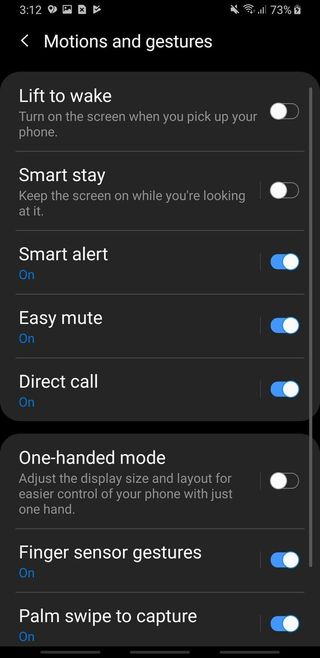
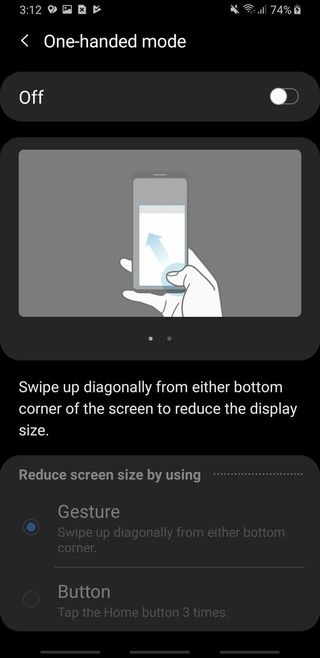
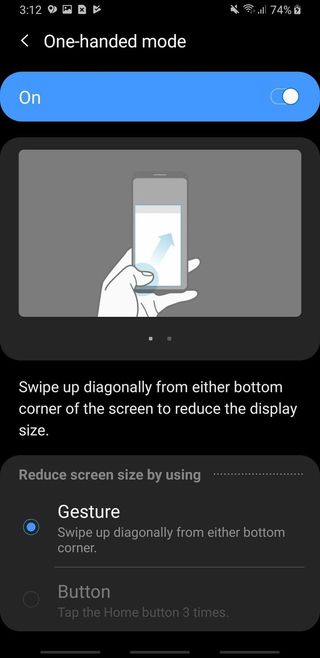
You can tap the name of each gesture feature to see an animated demonstration of the trigger and feature in action. One-handed mode, Easy mute, and Finger sensor gestures to open the notification shade are my favorites, but play around and see which ones fit your fancy.
Check out the Advanced features menu
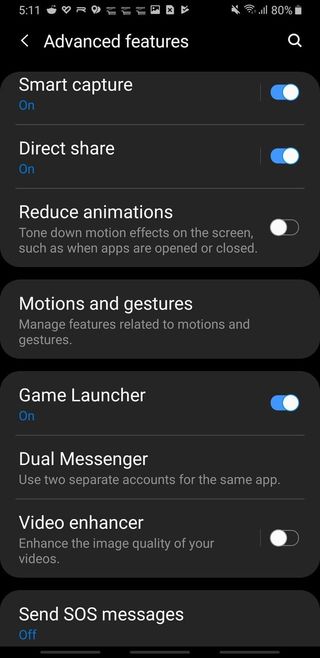
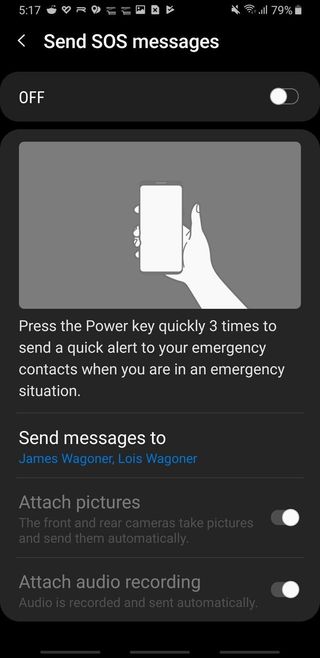
While we're in Advanced features, you should explore the other features available for your devices, especially as almost all of them are simple toggle-on/off features. Reduce animations can make the phone feel faster for power-users, Direct share can be a real time-saver for users that share images or attachments with the same contacts over and over again, and Send SOS messages can be a life-saving feature for younger users who can use SOS messages to essentially turn their phone into a panic button:
- Open the Settings app.
- Scroll down and tap Advanced features.
- Tap Motions and gestures.


- Tap Send SOS messages.
- Tap Off to toggle SOS messages on.
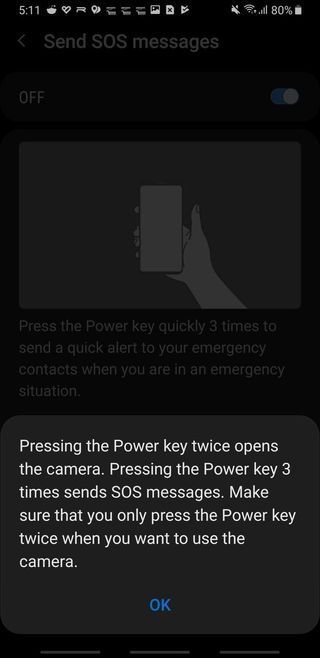
- Samsung treats you to a warning that two power button taps turns on the camera and three will send SOS messages, so you need to be very careful about how you click the power button. Tap OK to acknowledge the warning and continue.
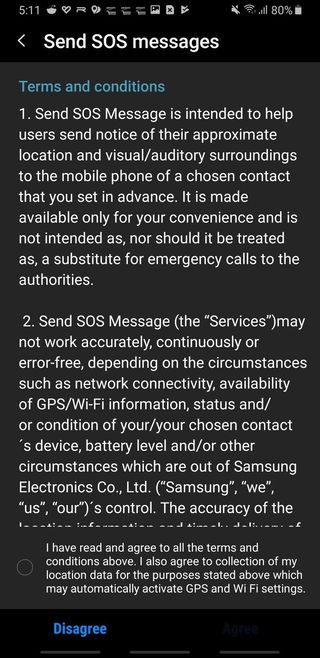
- SOS messages has its own Terms and conditions because it involves sending messages in emergency situations. Tap the checkbox next to "I have read and agree to all the terms".
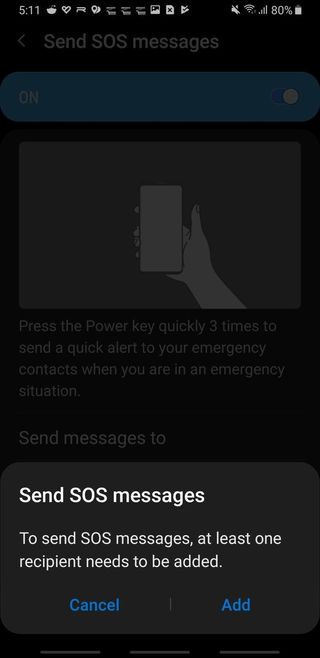
- You need to specify the contacts SOS will send messages to. Tap Add.
- Tap Add.

- Tap Select from contacts.
- Tap the contacts you want SOS messages to be sent to.
- Tap Done.
- Tap the back arrow in the top left corner of the screen to exit the contact selection menu.
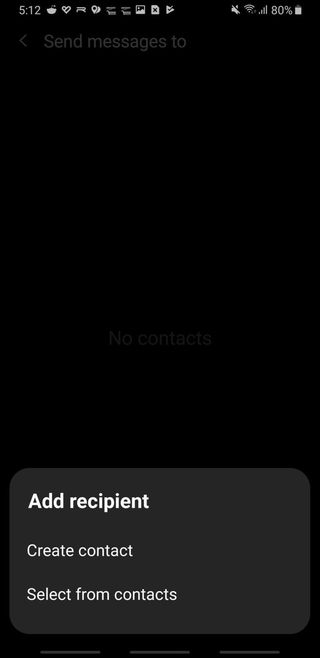
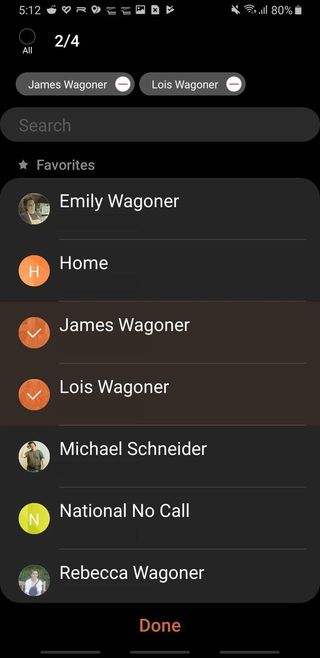

Again, really, keep in mind for SOS messages that since it only takes 3 clicks to activate it as opposed to OnePlus's 5 clicks, there can be a higher rate of accidental SOS messages, so I'd recommend not using the double-click power button for camera feature when SOS messages is turned on.
Be mindful of Adaptive battery (and how it can delay notifications)
Adaptive battery is one of the low-key heroes of Android Pie, but like any battery optimizer, it can have some drawbacks if it miscategorizes and hibernates an app that you rely on notifications from. Adaptive battery is turned on by default after the One UI update, but if you find it isn't prioritizing your apps well or it's delaying notifications too frequently, you can dig into Settings and turn it off.
- Open the Settings app.
- Scroll down and tap Device care.
- Tap Battery.

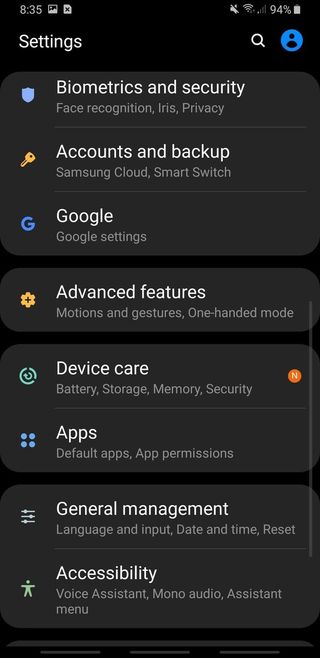
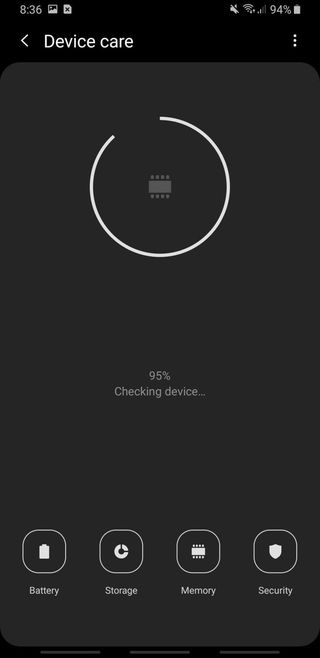
- Tap the three-dot menu button.
- Tap Settings.
- Tap the toggle next to Adaptive battery to turn it off.
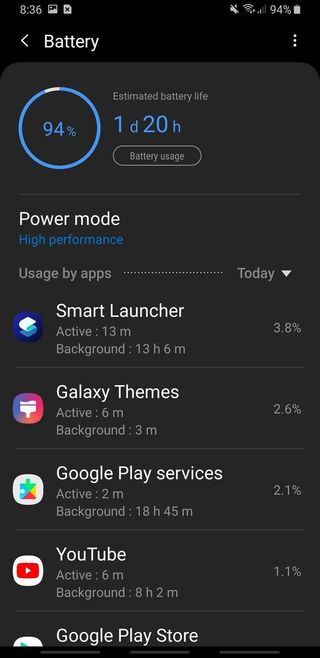
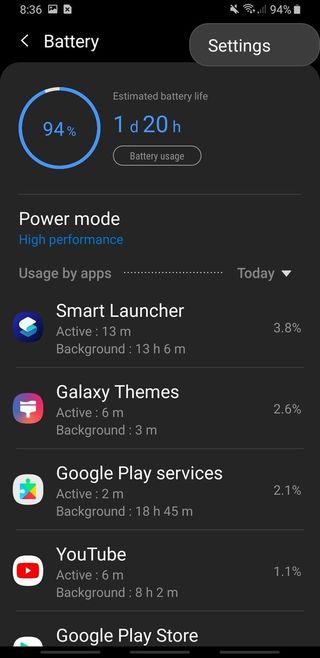
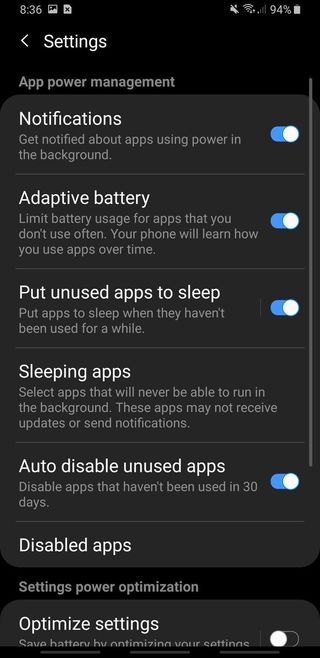
While you're in the menu, you can also check out the infrequently used apps that Samsung has put to sleep or flat out disabled. If there's an app you haven't been getting notifications from regularly, maybe it ended up here.
Get your notifications under control
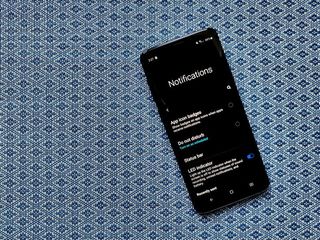
Every app is giving you more notifications than ever before, but with proper notification channel controls and a little bit of patience, you can make your notifications work for you instead of dragging you back into the bottomless abyss known at Twitter.
Dig deep and master your notifications in Samsung One UI
Turn on Lockdown
Between Iris recognition, face unlock, and Smart Lock's multitude of ways to keep your phone unlocked and ready to use, locking your phone isn't a mere matter of turning off the screen anymore. Depending on where you spend most your day with your phone usually unlocked, you should really consider having a method to lock your phone consistently and immediately if you see the cops coming- I mean you see a prankster coworker about to try and snatch your phone out of your hand out of your hand.
Android Pie comes equipped with the perfect feature for this, called Lockdown, which allows you to lock your phone and turn off Smart Lock, biometric security, and notifications on the lock screen. This will require you to put in your PIN or password to unlock the phone again, and regardless of whether you have anything to hide, this is also a good feature to keep turned on so you can lock your phone if you suspect you're about to be robbed.
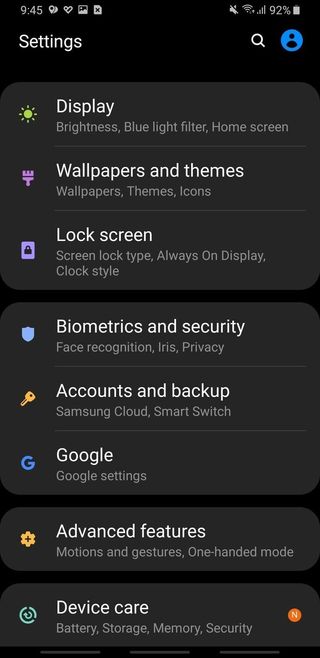
- Open the Settings app.
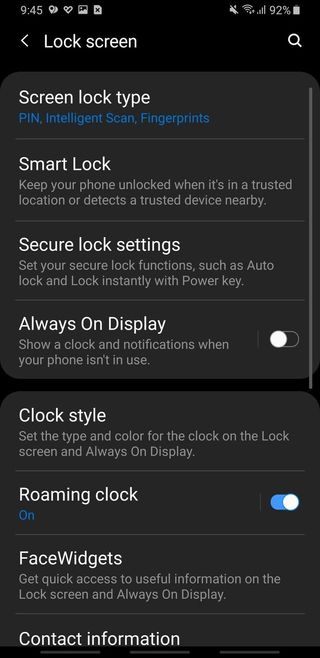
- Scroll down and tap Lock screen.
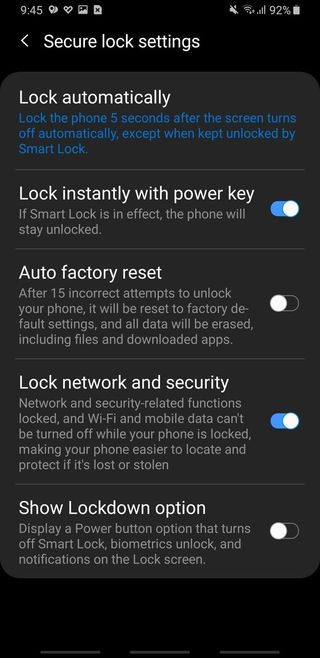
- Tap Secure lock settings.
- Tap Show Lockdown option.
- Additionally, if you want to lock your phone without disabling Smart Lock or lock screen notifications, tap Lock instantly with Power key.
Make your lock screen useful again
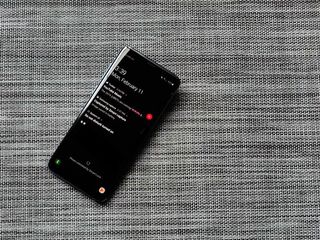
Samsung made some small but highly noticeable changes to your lock screen notifications with One UI, most notably that instead of actually showing the details and context of your notifications, by default are you see are a row of app icons. Make your notifications display properly again and keep notifications from certain, secretive apps from displaying for civilian eyes to see.
How to show all notifications on your lock screen with Samsung OnuUI
Configure your Always On Display
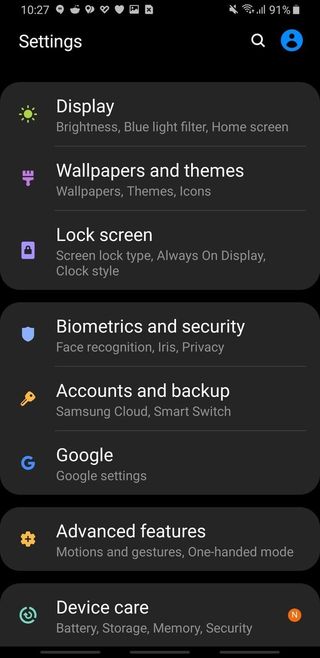
While we're still in the Lock screen menu, let's get your Always On Display in order. Always On Display (AOD) is more than just a pretty image and a clock that fades in and out on your screen, and whether you want to keep it minimal as can be or ultra-informative, there's an AOD style for everyone.
- Open the Settings app.
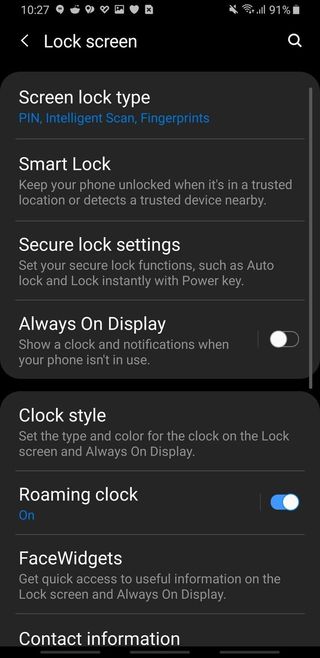
- Scroll down and tap Lock screen.
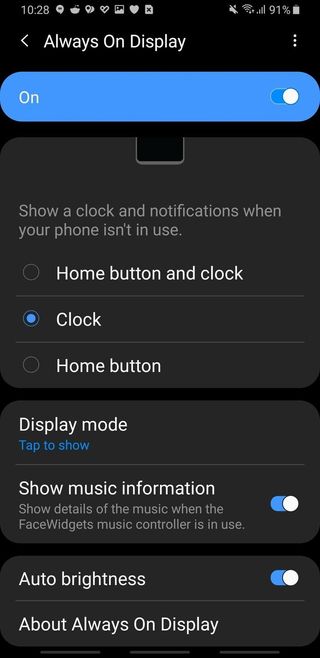
- Tap the text for Always On Display (not the toggle to the right).

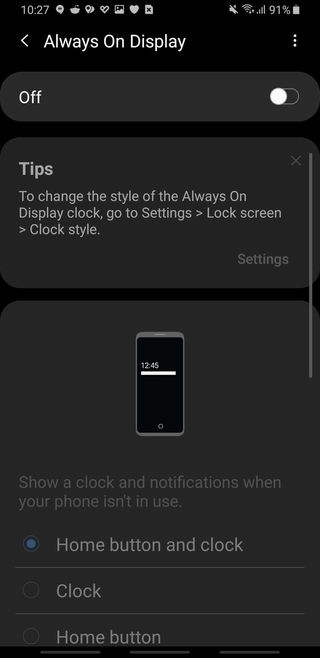
- Tap Off to toggle AOD on.
- Tap the Elements shows you prefer. I like Clock, but some people want the Home button and clock visible.
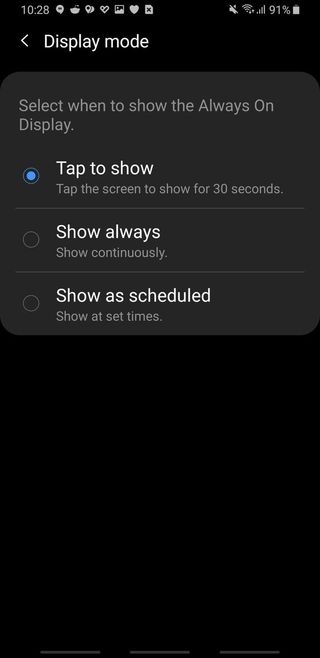
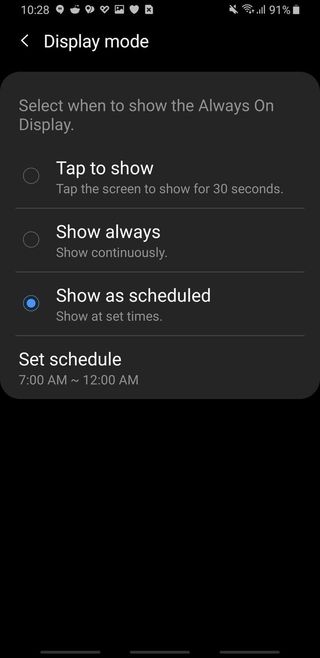
- Tap Display mode.
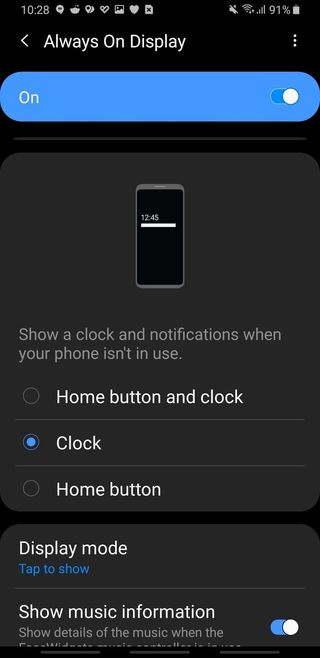
- Tap the mode you prefer. I like Tap to show as that allows you to see AOD when you want but won't show it all the time.
- Tap the back arrow in the top left corner of the screen.
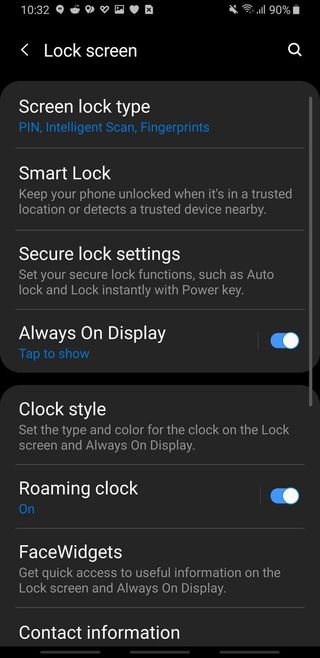
- Tap the back arrow in the top left corner of the screen again to go back to Lock screen settings.

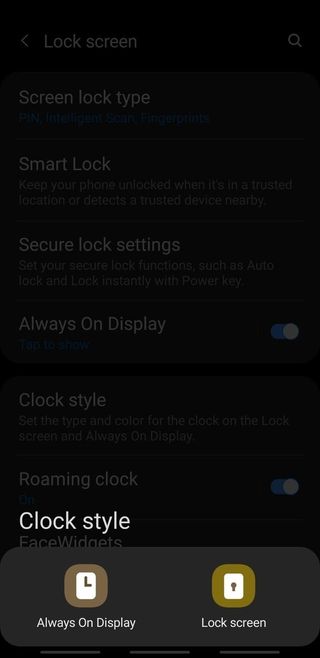
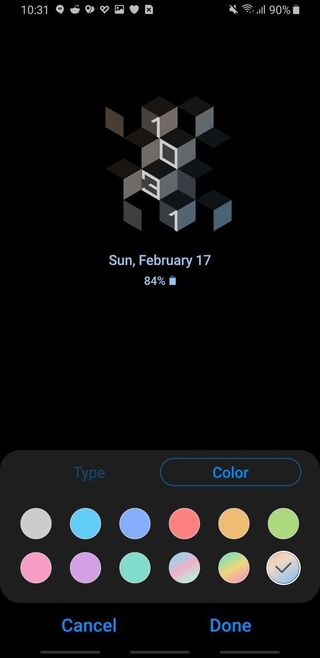
- Tap Clock style.
- Tap Always On Display.
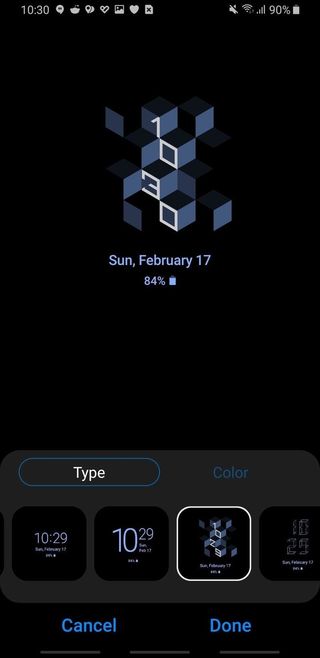
- Swipe through the carousel and tap the Clock style you want.
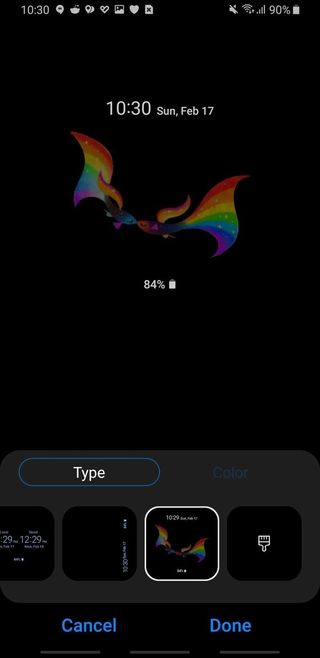
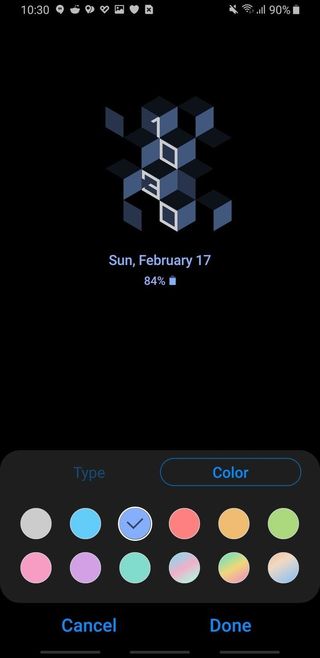
- Tap Color.
- Tap the color or gradient you want.
- Tap Done.
Put a widget or two at the top of your home screen
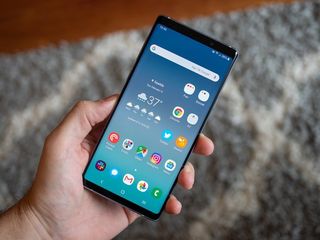
No, seriously, One UI is designed around the premise that you shouldn't be straining your thumbs trying to reach all the way up to the top of your screen, instead using the top third to half of the screen to display data that doesn't need much if any interaction. You should follow that example and add a widget or two to the top of your home screen with useful data that will prevent you from placing apps up there.
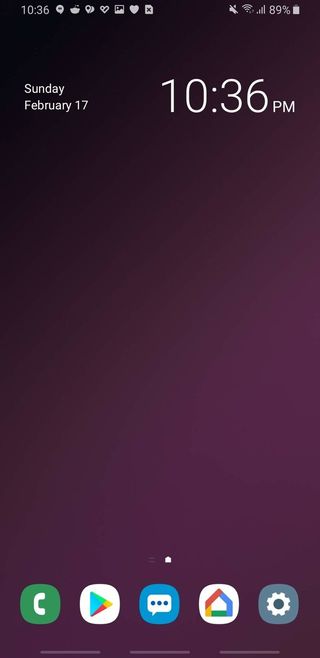
By default, Samsung puts a clock/weather widget top middle of your home screen, but there are better widgets out there — I'll highlight a few of my favorites below — but all widgets are basically applied the same way after we get rid of that clock widget.
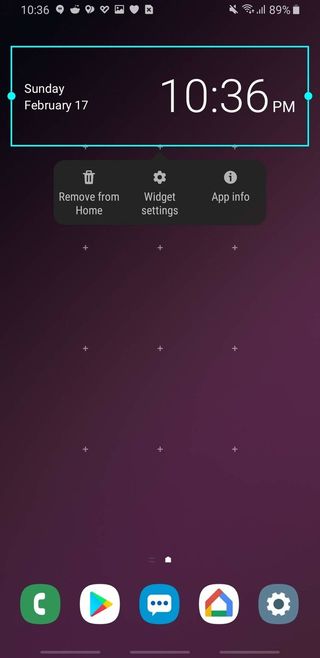
- Press and hold the Samsung clock widget until a menu appears.
- Tap Remove from Home screen.
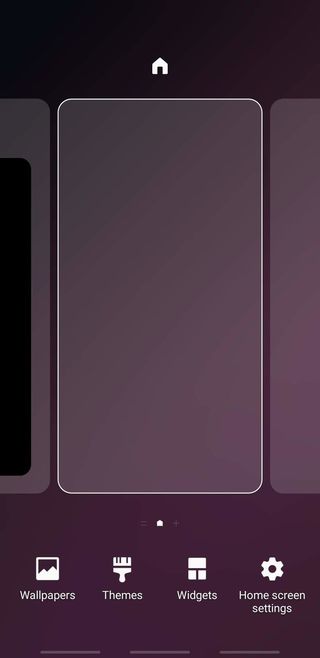
- Long-press an open space on your home screen.
- Tap Widgets.
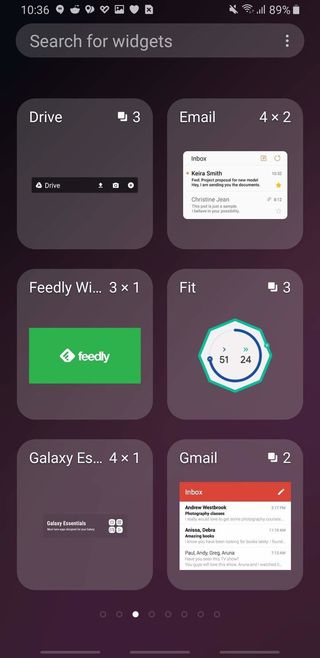
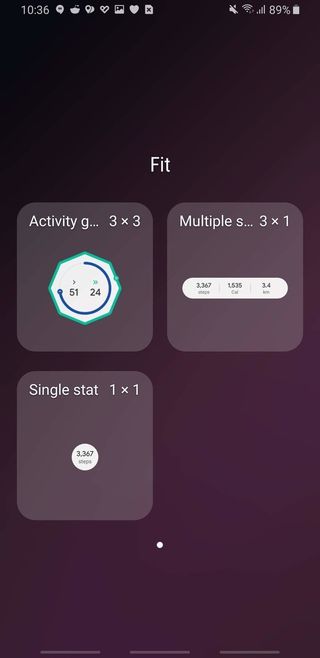
- Tap the app you want to add a widget from. In my case, I'm selecting Google Fit.
- Press and drag the widget you want out of its place in the menu and onto your home screen.
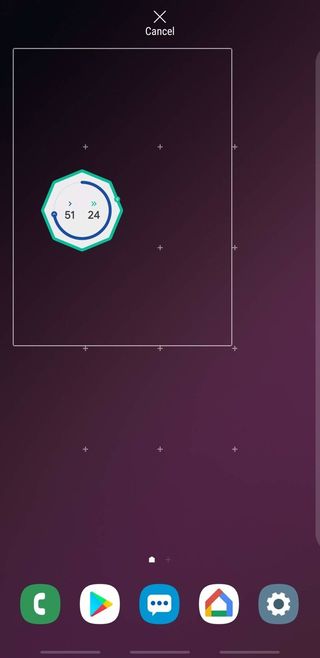
- Drag the border dots to resize your widget as desired. If the bar turns red, the widget can't get any smaller.
- Tap an empty space to exit the widget resizing menu.
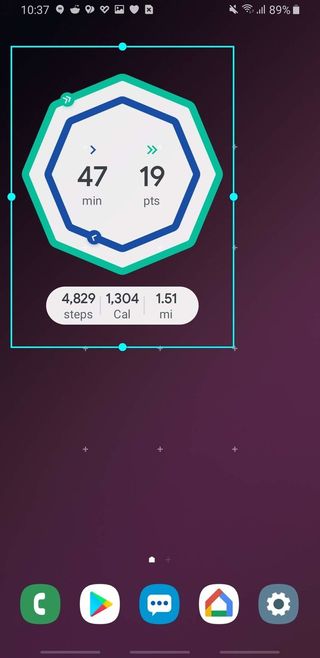
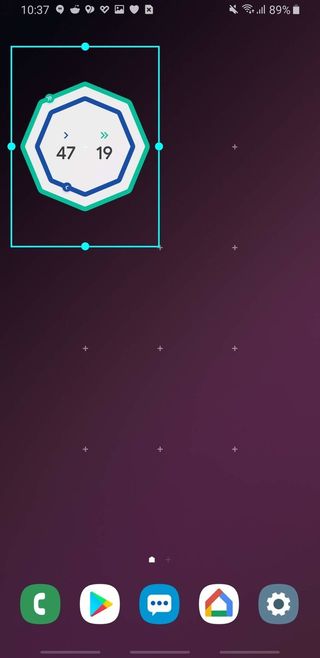
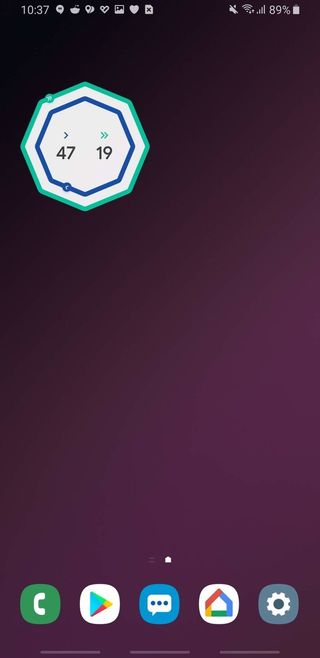
Repeat as desired with as many widgets as you want. If you don't know what widget to add up here, I have a few favorites to suggest:
- Most weather app have their own widgets, but 1Weather has 12 weather widgets in every shape and size for you to get as much or as little information as you like. Alternatively, if you live somewhere fun, Yahoo Weather's widgets will pull in photos from Flickr to display behind the weather widget, so I'll have a widget for Walt Disney World weather on my home screen and just refresh it to see pretty park pictures.
- Putting your fitness activity can be that extra little push to get out there and walk a little further every day, and Google Fit and Fitbit both have widgets to help you keep moving and hit those activity goals.
- Calendar widgets come in every size, shape, and color under the sun, but Calendar Widget by Home Agenda is one of the best ones we've seen in the last year, with excellent customization and theming to help it blend in or stand out with your particular home screen style.
- Most music apps come with a playback widget, but most of them are pretty ugly. If you want a music widget that doesn't suck, dip your toe in the pool of custom widgets with KWGT and its many music widget preset packs.
How to disable Bixby
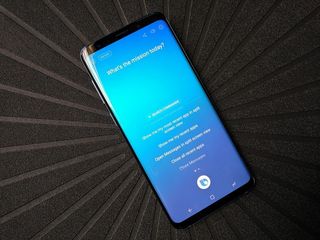
Yeah, yeah, we all want Bixby to die in a fire — well, actually I don't, but I do want it to not be in my face all the time, and thankfully we can shove it into a corner and disable its most annoying triggers and features pretty easily these days.
Be an expert in 5 minutes
Get the latest news from Android Central, your trusted companion in the world of Android
Ara Wagoner was a staff writer at Android Central. She themes phones and pokes YouTube Music with a stick. When she's not writing about cases, Chromebooks, or customization, she's wandering around Walt Disney World. If you see her without headphones, RUN. You can follow her on Twitter at @arawagco.

